Creating handmade wedding invitations transforms your special day’s first impression into something truly unforgettable. We’ve discovered that couples who create their own invitations save hundreds of dollars while adding personal touches that store-bought options simply can’t match. From elegant watercolor designs to rustic kraft paper creations, the possibilities are endless when you put your creativity to work.
Handmade invitations tell your unique love story before guests even arrive at your celebration. We’ll show you how simple techniques like calligraphy, pressed flowers, and creative folding can elevate basic materials into stunning keepsakes your loved ones will treasure. Whether you’re working with a tight budget or simply want invitations that reflect your personality, DIY options offer flexibility that traditional printing can’t provide.
Ready to create invitations that’ll have your guests talking? We’ve gathered the most inspiring and achievable handmade wedding invitation ideas that’ll make your big day even more special while keeping costs under control.
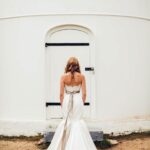
Rustic Charm: Kraft Paper and Twine Invitations
Rustic wedding invitations capture the essence of countryside romance while maintaining an elegant simplicity that modern couples adore. These handmade creations blend natural textures with timeless design elements to produce invitations that feel both authentic and sophisticated.
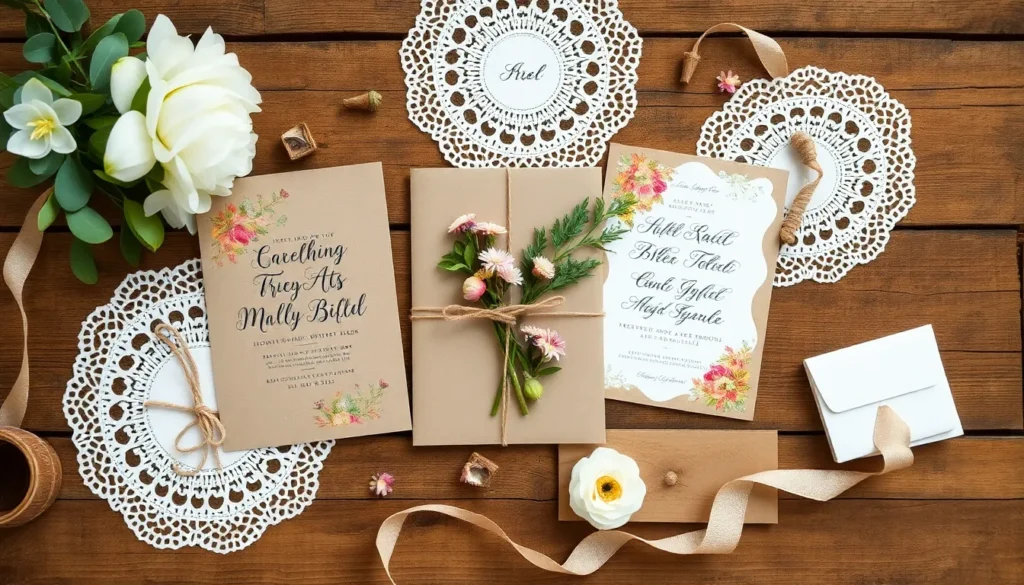
Brown Kraft Paper Base with Calligraphy
Brown kraft paper provides the perfect foundation for rustic wedding invitations because its natural texture and warm tone complement any outdoor or barn venue theme. We recommend selecting heavyweight kraft cardstock between 80-110 GSM to ensure your invitations feel substantial and professional.
Calligraphy transforms plain kraft paper into sophisticated wedding stationery that guests will treasure long after your special day. Beautiful script fonts like Modern Calligraphy or Brush Script create stunning contrast against the brown background while maintaining excellent readability.
Cream or white ink produces the most striking visual impact on kraft paper bases according to professional wedding stationers. Gold metallic pens add luxurious touches to important details like names and dates without overwhelming the rustic aesthetic.
Practice your lettering on sample kraft sheets before writing final invitations to achieve consistent spacing and pressure. Most couples find that practicing for 2-3 hours over several days produces professional looking results without formal calligraphy training.
Burlap Accents and Natural Twine Ties
Burlap ribbon strips create beautiful texture contrasts when layered across kraft paper invitation fronts in horizontal or vertical orientations. Cut burlap pieces 1-2 inches wide and slightly longer than your invitation width to allow for proper wrapping and securing.
Natural jute twine serves multiple purposes in rustic invitation design from simple bow accents to complete envelope wrapping systems. We’ve found that 2-3mm thickness twine provides the ideal balance between durability and delicate appearance.
Twine bow placement significantly impacts your invitation’s overall visual balance and should align with other design elements like text positioning. Corner bows create elegant asymmetrical compositions while center bows offer traditional symmetrical layouts.
Burlap backing layers add dimensional depth to kraft paper invitations when cut slightly smaller than the main card dimensions. This technique creates natural borders that frame your calligraphy while introducing additional texture without bulk.
Pressed Flower Embellishments
Pressed flower embellishments bring organic beauty to rustic kraft paper invitations while connecting your stationery to garden or outdoor wedding themes. Small blooms like baby’s breath violets and tiny daisies work exceptionally well on invitation-sized surfaces.
Flower pressing requires 2-3 weeks of preparation time so we recommend starting this process early in your invitation timeline. Heavy books phone books or dedicated flower presses produce the flattest results with minimal color loss.
Strategic flower placement enhances rather than competes with your calligraphy by choosing corners or border areas for embellishment positioning. Single flower accents create subtle elegance while small clustered arrangements provide more dramatic visual impact.
Clear adhesive dots or small amounts of create glue secure pressed flowers permanently to kraft paper without creating visible residue or texture bumps. Apply adhesive sparingly to preserve the delicate nature of pressed botanical elements while ensuring long term attachment.
Elegant Watercolor Techniques for Wedding Stationery
 1")
Watercolor techniques bring an artistic sophistication to handmade invitations that perfectly complements the rustic charm we’ve explored. These gentle, flowing designs create stunning focal points while maintaining the personal touch that makes DIY stationery so special.
Hand-Painted Floral Borders
Hand-painted floral borders transform simple invitation cards into works of art that guests will treasure long after your wedding day. We recommend starting with light pencil sketches of delicate roses, peonies, or eucalyptus branches around the edges of your stationery. Watercolor paints in soft pastels like blush pink, sage green, and lavender create romantic borders that frame your wedding details beautifully.
Practice makes perfect when creating these botanical elements, so we suggest testing different brush techniques on scrap paper first. Small round brushes work best for intricate petals and leaves, while flat brushes help create broader washes of color. Layering translucent watercolor washes builds depth and dimension in your floral designs, giving them a professional appearance that rivals expensive printed invitations.
Ombre Color Gradients
Ombre color gradients add sophisticated visual interest to wedding invitations while remaining surprisingly simple to execute. We love how these flowing color transitions create elegant backgrounds that make text pop without overwhelming the overall design. Start with your lightest shade at the top of the invitation and gradually blend darker tones toward the bottom using a damp brush technique.
Popular color combinations include dusty rose to deep burgundy for romantic autumn weddings, or soft blue to navy for seaside celebrations. The key to achieving smooth ombre effects lies in working quickly while the paint remains wet, allowing colors to naturally blend together. We find that misting the paper lightly with water before applying paint helps create those seamless color transitions that look professionally designed.
Custom Watercolor Portraits
Custom watercolor portraits of the couple create truly unique invitations that tell your personal love story through art. These miniature paintings typically measure 2-3 inches and can be incorporated into the main invitation or used as decorative elements on RSVP cards. We suggest working from high-quality engagement photos to capture your likenesses accurately while maintaining the soft, dreamy quality that watercolors provide.
Simple silhouettes work beautifully for couples who prefer minimalist designs, while more detailed portraits showcase facial features and wedding attire. The beauty of watercolor portraits lies in their imperfect, organic quality that adds character and warmth to your stationery suite. Professional artists often charge $50-150 per portrait, but creating your own versions using basic watercolor techniques can achieve stunning results at a fraction of the cost.
Vintage-Inspired Lace and Doily Designs
 2")
Building on the artistic foundation we’ve established with watercolor techniques, vintage lace and doily elements transport your handmade wedding invitations into a industry of timeless elegance. These delicate details create sophisticated textures that complement both rustic and romantic wedding themes.
Antique Doily Overlays
Doily overlays transform ordinary invitation cards into heirloom pieces that capture vintage charm. We recommend applying these intricate lace patterns directly onto your invitation cardstock or using them as elegant backing materials. Vintage doilies create stunning dimensional effects when layered behind your main invitation text, allowing the writing to show through the delicate openwork patterns.
Combining doilies with pearl accents or vintage buttons elevates the design’s sophistication. We’ve found that cream colored doilies work beautifully with kraft paper invitations, while white doilies create striking contrast against darker cardstock. Antique shops and estate sales often yield unique doily patterns that add authentic vintage character to your wedding stationery.
Lace Ribbon Wrapping
Lace ribbons provide versatile styling options that secure your invitation elements while adding romantic texture. We suggest using these delicate ribbons as belly bands around your invitation suite or tying them into elegant bows that complement your overall design. The intricate patterns of lace ribbons create visual interest without overwhelming your invitation’s focal elements.
Pairing lace with complementary materials like burlap or seeded paper achieves a balanced rustic elegance. We’ve discovered that ivory lace ribbons work particularly well with natural kraft paper, while champagne colored ribbons complement watercolor backgrounds beautifully. These ribbon details can also secure multiple invitation pieces together, creating cohesive presentation packages.
Pearl and Button Accents
Pearl embellishments add classic sophistication that enhances your vintage themed invitations. We recommend using small pearl clusters or individual pearls as corner accents or center focal points. These lustrous details catch light beautifully and create elegant contrast against matte paper textures.
Button accents offer charming vintage character that reflects traditional craftsmanship values. We suggest selecting antique style buttons in ivory, cream, or soft gold tones that complement your color palette. These three dimensional elements can anchor ribbon ties or serve as decorative corners, adding tactile interest that guests will appreciate when handling your invitations.
Modern Minimalist Paper Cutting Creations
 3")
We’re moving beyond traditional invitation embellishments to explore the sophisticated industry of minimalist paper cutting techniques. These contemporary designs combine precision craftsmanship with clean aesthetics to create invitations that feel both modern and timeless.
Geometric Laser-Cut Patterns
Geometric laser cut patterns transform ordinary cardstock into architectural masterpieces that reflect modern design sensibilities. We recommend utilizing precise shapes like chevrons, hexagons, and triangles to create stunning visual impact while maintaining clean lines. These patterns work beautifully as invitation borders, creating structured frames that draw attention to your wedding details without overwhelming the design.
Laser cutting technology allows us to achieve millimeter perfect precision that’s impossible with traditional cutting methods. Consider using these geometric elements as overlay pieces on contrasting backgrounds, where the interplay between positive and negative space creates visual depth. The sharp angles and mathematical precision of geometric patterns perfectly complement contemporary wedding themes and venues with modern architecture.
Silhouette Portrait Cutouts
Silhouette portrait cutouts offer couples a deeply personal way to incorporate their unique love story into their wedding invitations. We suggest creating custom silhouettes from meaningful moments like your first dance, proposal scene, or favorite shared activity. These intimate portraits become the focal point when placed against simple, contrasting backgrounds that highlight every delicate detail.
Paper cutting allows us to capture intricate details that make each silhouette truly unique to your relationship. Consider incorporating important elements from your courtship, such as the cityscape where you met or symbolic objects that represent your shared interests. The key lies in choosing high contrast color combinations that ensure your silhouette remains crisp and readable against its background.
Clean Line Typography
Clean line typography serves as the foundation for minimalist invitation design, where every letter contributes to the overall aesthetic impact. We recommend selecting sans serif fonts with generous spacing that allows each word to breathe within the design layout. Typography becomes an art form when we treat text as both information and visual element, creating hierarchy through size variation rather than decorative flourishes.
Modern minimalist invitations rely on typography to convey elegance through restraint rather than ornamentation. Consider using only one or two complementary fonts throughout your entire invitation suite to maintain visual consistency. The strategic use of white space around text blocks creates breathing room that enhances readability while reinforcing the minimalist aesthetic that defines contemporary wedding design.
Nature-Themed Botanical Invitations
 4")
Building on the artistic foundation we’ve established with watercolor techniques, nature-themed botanical invitations bring the organic beauty of the outdoors directly into your wedding stationery. These designs celebrate the natural industry through authentic botanical elements that create stunning visual impact.
Real Pressed Flower Inclusions
Incorporating real dried flowers elevates your invitations from simple paper to living art pieces. We recommend collecting flowers during peak bloom season and pressing them between heavy books for 2-3 weeks before use. Popular choices include pansies, violets, and baby’s breath, which maintain their color and shape beautifully when dried.
Creating floral collages adds dimension and texture that matches your wedding’s color scheme perfectly. Position dried flowers as centerpiece elements on invitation fronts or arrange them as delicate borders around text areas. We’ve found that using a small amount of clear create glue ensures flowers stay secure without creating visible adhesive marks.
Layering pressed flowers with translucent vellum creates depth while protecting the botanical elements. This technique adds elegance and fragility that guests will treasure as keepsakes long after your special day.
Leaf Print Stamping
Using actual leaves creates authentic impressions that capture nature’s intricate details on paper. We suggest collecting leaves with interesting shapes like maple, oak, or fern varieties during their peak condition. Press fresh leaves between sheets of paper overnight to remove excess moisture before stamping.
Applying ink directly to leaf surfaces produces the most detailed and organic impressions. Roll a thin layer of ink onto the leaf’s textured side using a brayer, then press firmly onto cardstock for 10-15 seconds. We recommend testing different pressure levels to achieve the perfect balance between detail clarity and ink saturation.
Creating leaf impression borders frames your wedding details with natural elegance. Arrange multiple leaf prints around invitation edges or use single statement leaves as corner accents that complement your botanical theme.
Wooden Veneer Accents
Adding wooden veneer elements brings rustic earthiness that perfectly complements nature-themed designs. We recommend using thin wood veneers in species like birch, cherry, or walnut that can be easily cut with create knives or laser cutting services. These materials add warmth without overwhelming delicate botanical elements.
Using wooden elements as borders or frames creates structure that grounds organic design components. Cut veneer strips to frame invitation text areas or create geometric shapes that contrast beautifully with flowing botanical illustrations. We’ve discovered that sanding veneer edges lightly prevents paper tears during assembly.
Incorporating wood as backing material transforms standard cardstock into substantial, memorable pieces. Layer translucent vellum over wooden backings to create depth while maintaining text readability. This combination achieves the perfect balance between natural texture and sophisticated presentation that guests will admire.
Personalized Photo Collage Invitations
 5")
Photo collages transform ordinary wedding invitations into treasured keepsakes that showcase your unique love story. These handmade invitations capture memorable moments while creating an intimate connection with your guests.
Engagement Photo Integration
Engagement photos serve as the perfect centerpiece for your handmade wedding invitations, creating an immediate personal connection with your guests. We recommend printing your favorite engagement shot on high-quality cardstock and centering it on the invitation’s front panel. Professional photographers suggest using images with good contrast and clear focal points to ensure they translate well to smaller invitation sizes.
Different photo placement techniques offer various visual impacts for your wedding invitations. Positioning your engagement photo as a full background creates a romantic, magazine-style layout that draws attention to your love story. Alternatively, we can frame the photo with decorative borders or place it in the upper third of the invitation to leave space for elegant typography below.
Color coordination between your engagement photos and invitation design creates a cohesive, polished appearance. Neutral toned photos work beautifully with gold foil accents, while vibrant outdoor shots pair perfectly with natural kraft paper backgrounds. Wedding planners recommend selecting invitation colors that complement the dominant hues in your engagement photos for the most harmonious results.
Couple’s Journey Timeline
Timeline invitations tell your complete love story through carefully curated milestones and meaningful moments. We suggest creating a visual timeline that starts with your first meeting and progresses through key relationship moments like your first date, moving in together, and the proposal. Each milestone can be represented with small icons, mini photos, or handwritten dates that guide guests through your romantic journey.
Interactive timeline designs engage guests while showcasing your relationship’s evolution over time. Accordion-style fold-out invitations allow for extended timelines that unfold to reveal your complete story. We can also create timeline cards that guests can flip through, with each card featuring a different chapter of your relationship alongside relevant photos or illustrations.
Storytelling elements transform simple timeline invitations into captivating narratives that guests will cherish. Including brief descriptions of each milestone, such as “First vacation together in Napa Valley” or “Adopted our rescue dog Luna,” adds personal touches that make your invitations memorable. Hand-lettered quotes from your relationship or inside jokes create intimate connections that reflect your unique personalities.
Polaroid-Style Mini Albums
Polaroid-style mini albums create interactive invitation experiences that guests can keep as lasting mementos of your special day. We recommend creating small booklets with 4-6 Polaroid-sized photos that showcase different aspects of your relationship, from casual everyday moments to special celebrations. These mini albums can be attached to traditional invitation cards or serve as standalone invitation keepsakes.
DIY Polaroid printing techniques help achieve that authentic vintage look without expensive equipment. Printing your photos with white borders on matte cardstock mimics the classic Polaroid aesthetic perfectly. We suggest using photo editing apps to add vintage filters and slightly faded colors that enhance the nostalgic feel of your mini album invitations.
Binding options for your Polaroid mini albums range from simple to sophisticated depending on your crafting skills. Small metal rings create a flip-book effect that’s easy to assemble and budget-friendly. Alternatively, we can use decorative ribbons or twine to bind the photos together, adding rustic charm that complements other natural invitation elements like pressed flowers or kraft paper.
Calligraphy and Hand-Lettered Masterpieces
 6")
Beautiful handwritten elements transform ordinary wedding invitations into personalized works of art. These traditional techniques offer couples endless possibilities to express their unique style while creating memorable keepsakes for their special day.
Custom Brush Lettering Styles
Custom brush lettering creates distinctive character that sets your invitations apart from mass-produced alternatives. We recommend practicing modern brush scripts that feature fluid strokes and natural variations in line weight. Popular styles include bounce lettering with playful ascending and descending letters, while classic pointed pen techniques offer timeless elegance for formal ceremonies.
Different brush pens produce varying effects, from fine-tip markers for delicate scripts to broad calligraphy brushes for bold statement pieces. Practicing consistent letter spacing ensures professional results, and we suggest creating practice sheets with your names and wedding details before working on final invitations. Mixing uppercase and lowercase letters adds visual interest while maintaining readability for guest information.
Metallic Ink Accents
Metallic ink accents elevate handmade invitations with luxurious shimmer that catches light beautifully. Gold ink complements warm color palettes and creates stunning contrast against navy, burgundy, or forest green cardstock. Silver accents work perfectly with cool tones like dusty blue, lavender, or sage green backgrounds.
We’ve found that metallic gel pens offer excellent control for detailed work, while dip pens with metallic ink create authentic calligraphy effects. Rose gold provides a modern romantic touch that’s particularly popular for contemporary weddings. Testing different metallic shades on your chosen paper ensures the best color coordination, as some papers absorb ink differently and may affect the final appearance.
Flourish and Swirl Details
Flourish and swirl details add elegant decorative elements that frame your wedding text beautifully. These ornamental touches work best when placed strategically around names, dates, or venue information without overwhelming the overall design. We suggest starting with simple curves and gradually building complexity as your confidence grows.
Traditional flourishes include heart shapes, infinity symbols, and vine-like scrollwork that connects different text elements. Practice creating consistent pressure variations to achieve thick and thin lines that give flourishes their characteristic grace. Border flourishes can frame entire invitations, while accent swirls highlight exact words like “wedding” or the couple’s names for added emphasis.
Creative Folding and Pocket Invitations
 7")
Moving beyond traditional flat invitations, creative folding techniques and pocket designs offer interactive elements that surprise and delight your wedding guests. These dimensional approaches transform simple cardstock into captivating keepsakes that guests will treasure long after your special day.
Tri-Fold Accordion Styles
Tri-fold accordion invitations create a captivating unfolding experience that reveals your wedding details in stages. We love how these designs allow you to organize information logically, with the ceremony details on the first panel, reception information on the second, and additional details like accommodations on the third. The accordion style folding technique works beautifully with various paper weights, though we recommend using cardstock between 65-80 lb for optimal durability.
Creating the perfect fold requires precision measuring and scoring each crease before folding. Start by dividing your paper into three equal sections, then use a bone folder to create sharp, professional looking creases. This technique pairs wonderfully with watercolor backgrounds or pressed flower designs, as the extended format provides ample space for artistic elements to shine throughout the unfolding process.
Envelope Pocket Inserts
Envelope pocket designs offer a sophisticated solution for organizing multiple invitation components while maintaining an elegant presentation. We recommend creating pockets inside your invitation envelopes to hold RSVP cards, accommodation information, and registry details without cluttering the main invitation. This approach keeps everything organized while adding an element of discovery for your guests.
Constructing pocket inserts involves cutting cardstock slightly smaller than your envelope’s interior dimensions, then scoring and folding to create the pocket opening. Secure the pocket using double sided tape or a thin line of glue along the bottom and side edges. These pockets work exceptionally well with lace laser cut designs or gold foil details, creating layers of texture and visual interest that enhance the overall invitation experience.
Pop-Up Card Mechanisms
Pop-up card techniques transform flat invitations into three dimensional works of art that surprise guests with their interactive elements. We’ve found that simple pop-up mechanisms work best for wedding invitations, such as a heart that springs up when the card opens or silhouettes of the couple that create depth and movement. These mechanisms require precise cutting and folding but create unforgettable first impressions.
Building pop-up elements starts with creating a template on lightweight cardstock, then cutting intricate shapes that will fold and spring into position. The key lies in understanding how the fold lines work together to create the dimensional effect when the card opens. This technique combines beautifully with hand-tied ribbons or real flowers, as the pop-up element can incorporate these natural materials into the three dimensional design for a truly unique invitation experience.
Themed Destination Wedding Invitations
 8")
When your wedding takes place far from home, destination themed invitations set the perfect tone for your celebration. These creative designs incorporate travel elements that capture the excitement of your special journey together.
Travel-Inspired Map Designs
Map backgrounds transform ordinary cardstock into personalized invitations that showcase your chosen destination. We recommend using vintage maps or watercolor map prints as the foundation, adding markers or stickers to highlight your wedding location with precision. Custom route illustrations can trace the path from your hometown to the wedding venue, creating a visual story of your journey together.
Topographical elements add depth and authenticity to map designs, especially for mountain or coastal destinations. Layering translucent vellum over detailed maps creates a sophisticated effect while maintaining readability of your wedding details. Compass rose accents positioned in corners provide navigational flair that reinforces the travel theme throughout your invitation suite.
Passport-Style Booklets
Authentic passport covers replicate the look of real travel documents with official styling and color schemes. We suggest using navy blue or burgundy cardstock to mimic traditional passport colors, complete with gold foil stamping for country names or your wedding location. Multiple page formats allow you to organize ceremony details, reception information, and travel logistics in separate sections.
Stamped entry pages create interactive elements that guests will remember, featuring custom stamps with your wedding date and location. Perforated edges add realistic details that enhance the authentic passport experience. Photo integration works beautifully on the first page, featuring engagement photos formatted like official passport pictures with your names and wedding date below.
Luggage Tag Attachments
Miniature luggage tags attached to invitation cards provide functional charm while reinforcing your destination theme. We recommend using kraft paper or leather textured cardstock cut into traditional luggage tag shapes, complete with reinforced holes and metal eyelets. Destination details printed on tags include your wedding location, date, and travel information in a format that mirrors real luggage tags.
Colorful string ties connect tags to invitations using waxed cord or ribbon that matches your wedding colors. Vintage style tags with distressed edges create an authentic travel worn appearance that adds character to your invitation suite. Multiple tag combinations work well for destination weddings with multiple events, allowing you to create separate tags for welcome parties, ceremonies, and reception details.
Budget-Friendly DIY Invitation Ideas
 9")
Creating stunning handmade wedding invitations doesn’t have to drain your wedding budget. Smart planning and resourceful techniques can help you design beautiful invitations that rival expensive professional options.
Printable Template Customization
Canva templates offer an excellent starting point for couples seeking professional designs without the professional price tag. We recommend exploring both free and premium templates that match your wedding theme, allowing you to customize colors, fonts, and layouts with ease. Modern designs featuring clean lines and elegant typography work particularly well for digital customization.
Adobe InDesign provides advanced design capabilities for couples comfortable with graphic design software. This powerful tool lets you arrange custom elements like floral illustrations, adjust color palettes to match your wedding scheme, and create precise layouts that look professionally crafted.
Free template resources from wedding blogs and design websites can significantly reduce your invitation costs. Download multiple template styles to mix and match elements, creating a unique design that reflects your personal style while staying within budget.
Bulk Material Shopping Tips
Chipboard purchases in bulk quantities provide sturdy backing for your invitations at a fraction of retail costs. We suggest buying chipboard in neutral colors like cream or white, which complement most design themes and provide excellent durability for mailing.
Vellum paper sheets create elegant transparent overlays that add sophistication to basic cardstock invitations. Purchase vellum in large quantities to use as belly bands around your invitations, creating a layered look that appears expensive but costs very little.
Metallic paper buying in bulk transforms ordinary envelopes and inserts into luxurious components. Gold and silver metallic papers work especially well for adding glamorous touches to your invitation suite without requiring expensive foil stamping services.
Simple Assembly Techniques
Laser cut pockets eliminate complex folding and measuring while providing professional looking results. These pre made pockets streamline your assembly process and create consistent, polished invitations that guests will admire.
Glue application using milk glue or standard glue sticks ensures secure attachment of decorative elements like foil accents and dried flowers. Apply glue sparingly to avoid visible residue, and press elements firmly for lasting adhesion.
Embellishment additions such as satin bows and natural twine ribbons enhance your invitations’ visual appeal with minimal effort. Tie these decorative elements around assembled invitations to create finishing touches that elevate the overall design.
Conclusion
Your wedding invitations set the stage for your special day and handmade designs offer endless possibilities to express your unique love story. We’ve explored techniques that range from rustic kraft paper creations to elegant watercolor masterpieces and modern minimalist designs that’ll captivate your guests.
The beauty of DIY wedding invitations lies in their ability to blend creativity with budget-consciousness. Whether you’re drawn to vintage lace details pressed flower embellishments or destination-themed designs there’s a handmade approach that perfectly matches your vision.
Remember that every technique we’ve discussed can be adapted to your skill level and timeline. Start with simple elements like calligraphy practice or basic folding techniques then gradually incorporate more complex features as your confidence grows.
Your handmade invitations will become treasured keepsakes that reflect the love and care you’ve poured into planning your wedding day.
Frequently Asked Questions
How much money can I save by making handmade wedding invitations?
Handmade wedding invitations can save couples 50-70% compared to professional printing services. By purchasing materials in bulk and using your own labor, you can create beautiful invitations for $2-5 per invitation versus $10-25 for custom professional designs. The exact savings depend on your chosen materials and complexity of design.
What are the best materials for rustic wedding invitations?
Brown kraft paper is ideal for rustic invitations, offering natural texture and warm tones. Complement it with burlap accents, natural twine ties, and pressed flower embellishments. Use calligraphy with earth-tone inks like deep brown or forest green to enhance the rustic aesthetic while maintaining elegance.
How can I create watercolor effects on my wedding invitations?
Start with light pencil sketches of your design, then use soft pastel watercolors with minimal water for control. For ombre gradients, blend colors while wet, working from light to dark. Practice on scrap paper first, and allow each layer to dry completely before adding details or text.
What are the essential tools for calligraphy on wedding invitations?
You’ll need quality calligraphy pens or brush pens, smooth cardstock, practice paper, and guidelines or light boxes. Start with beginner-friendly pens like Tombow Dual Brush Pens or Pilot Parallel Pens. Metallic inks add luxury, while consistent letter spacing creates professional results.
How do I incorporate pressed flowers into my invitations?
Choose flowers like pansies, violets, or small roses and press them for 2-4 weeks between heavy books. Attach them using small dots of craft glue or double-sided tape. Layer with translucent vellum for protection, or create collages by arranging multiple flowers in balanced compositions.
What paper cutting techniques work best for modern invitations?
Geometric laser-cut patterns using shapes like chevrons and triangles create structured, architectural designs. For DIY options, use craft knives with metal rulers for clean lines. Silhouette cutouts work well with high-contrast colors, while maintaining at least 2mm between cut lines ensures structural integrity.
How can I create destination wedding invitations on a budget?
Use printable map templates from free online resources, then customize with watercolors or markers to highlight your wedding location. Create passport-style booklets using standard cardstock folded and stapled. Add luggage tag attachments using cardstock and string for an authentic travel theme without expensive materials.
What are the best ways to organize multiple invitation components?
Tri-fold accordion designs organize information logically across panels, while envelope pocket inserts keep RSVP cards and details together. Create pockets using decorative paper folded and glued to the main invitation. This keeps everything organized while adding interactive elements that engage your guests.
How do I achieve professional-looking results with DIY invitations?
Focus on consistent spacing, quality materials, and practice your techniques beforehand. Use templates for consistent sizing, invest in good adhesives, and allow proper drying time. Create assembly line processes for efficiency, and always make extra invitations to account for mistakes during the crafting process.
Where can I find affordable materials for handmade invitations?
Shop bulk suppliers like Amazon or wholesale craft stores for cardstock, vellum, and embellishments. Check local craft store sales and clearance sections. Online platforms like Etsy offer unique materials at competitive prices. Buy seasonal items like ribbons and flowers during off-peak times for additional savings.